Spring Data, Spring Boot, MongoDB (Example & Tutorial)
MongoDB is a schemaless document store that is easy to learn and quick to prototype with. Spring Boot and Spring Data make it even easier to get a simple application up and running. With a little bit of configuration and minimal code, you can quickly create and deploy a MongoDB-based application.
This tutorial covers Spring Data and MongoDB, but not any UI components. The full source for this project, including controllers and views, can be found on GitHub here. You are welcome to download that project and follow along, or follow the directions below.
Recommendation
If your company is hiring a Java developer, check out this Java test prepared by our professionals. It will allow you to identify the best talents very easily!
Getting started
Let’s build a simple car database with Mongo. We’ll be able to add cars to it, view a list of them, and search for cars.
First, make sure you have installed MongoDB and are able to run it.
Second, make sure you have Maven 3.x installed, which you can download here.
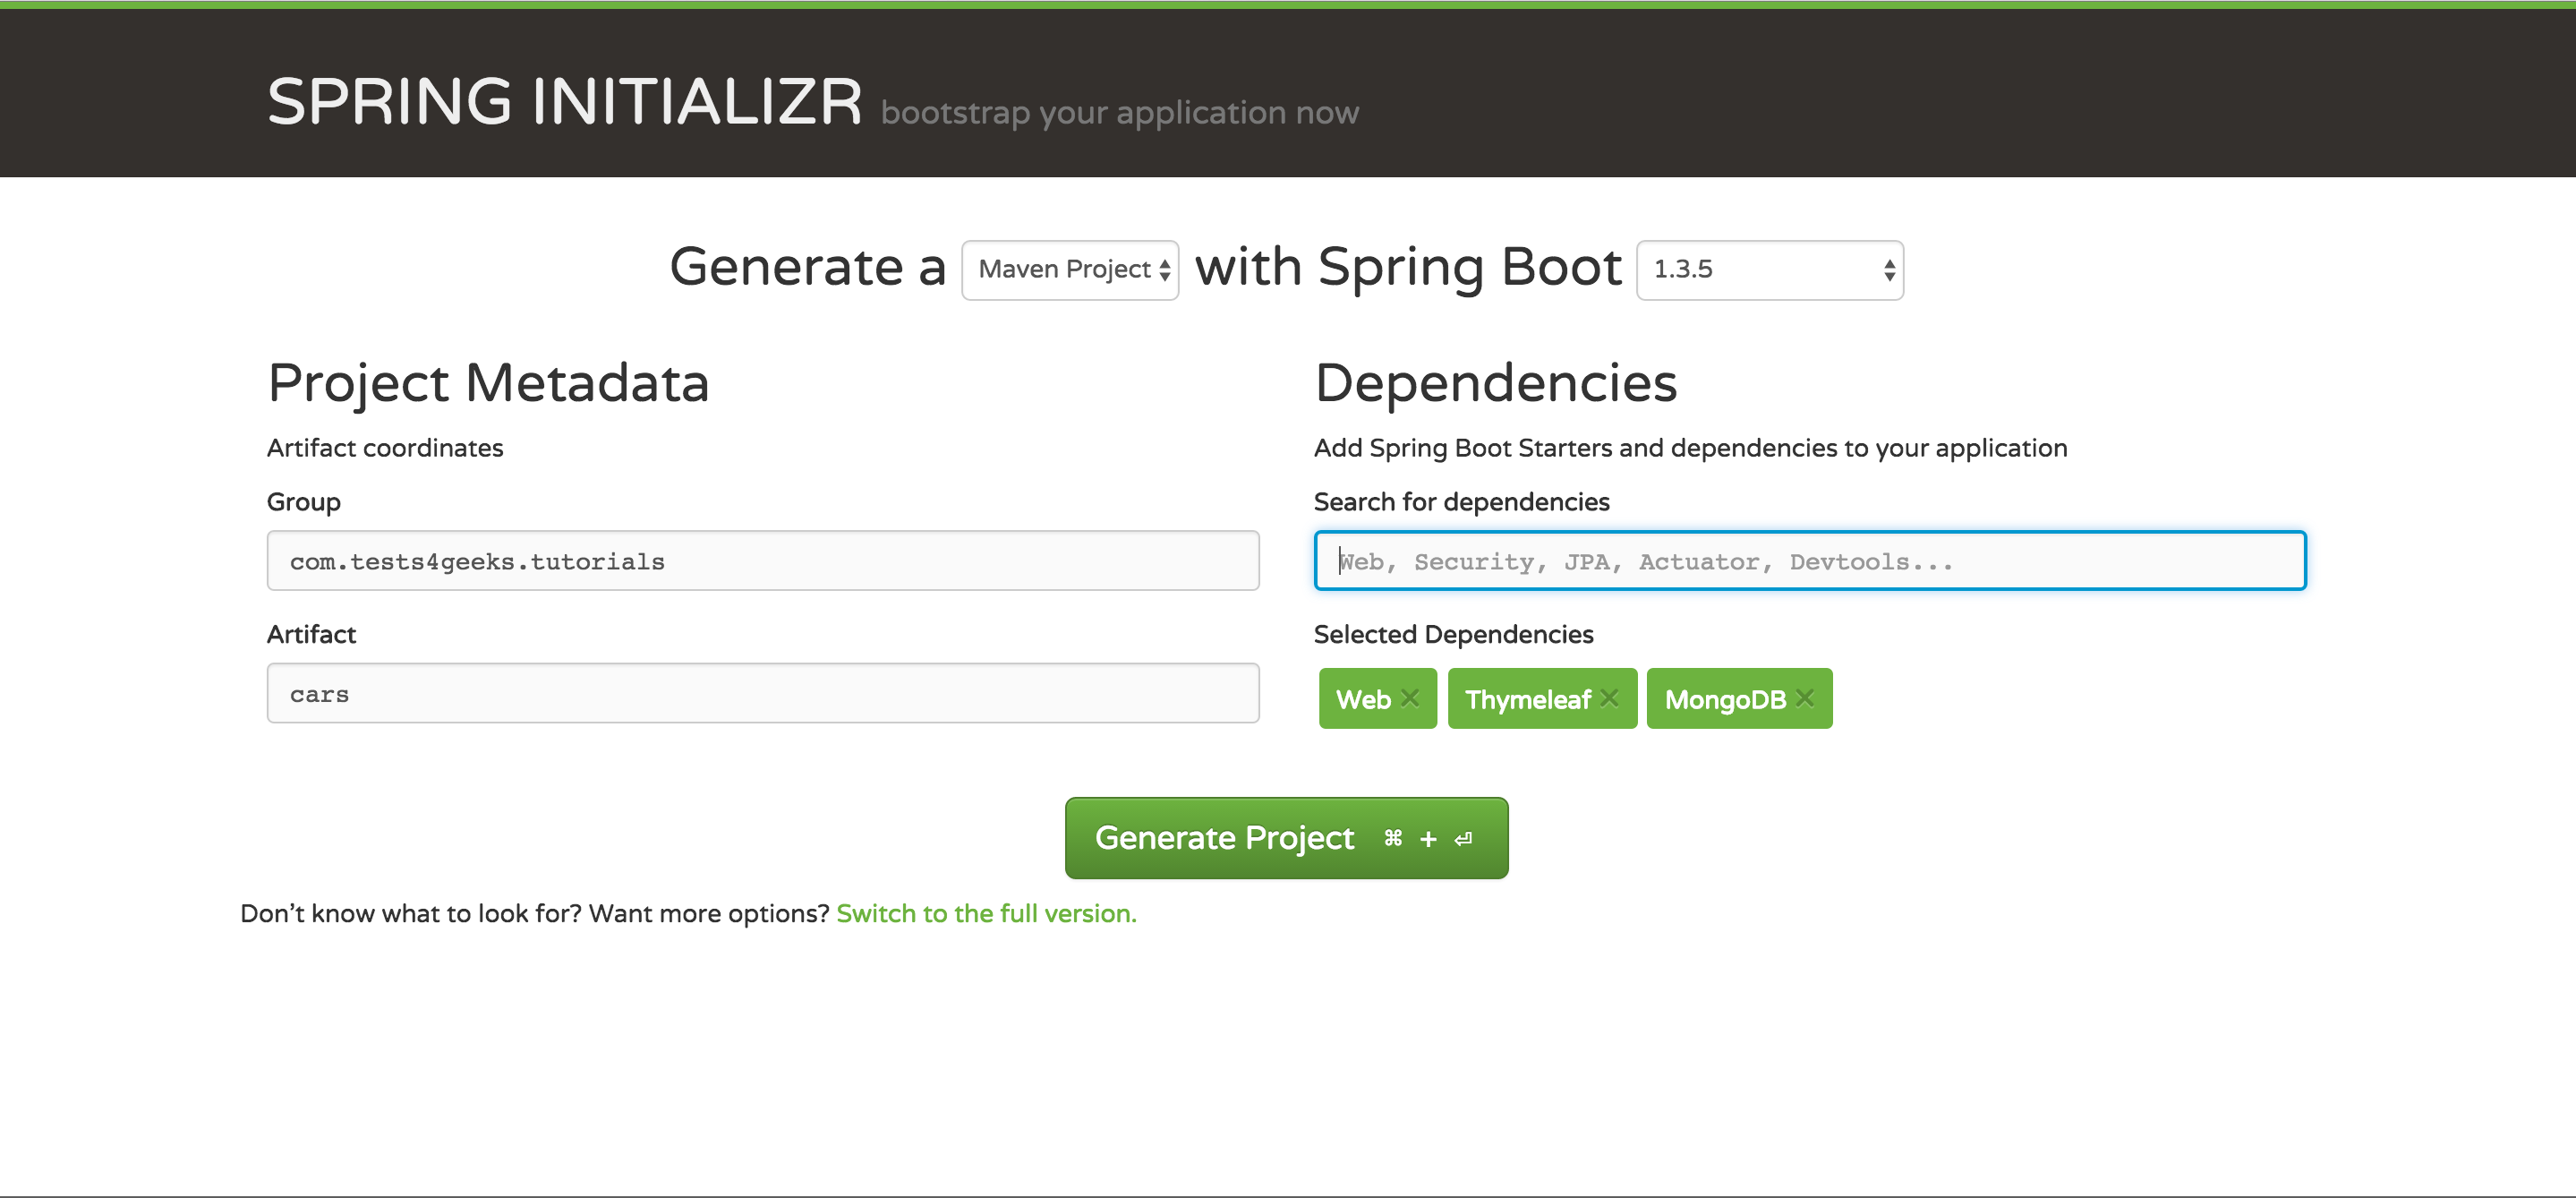
Next, we want to create a Spring Boot application. You can do so by using the web-based wizard here (and depicted in the image below). In the dependencies section, you’ll want to select: Web, Thymeleaf, and MongoDB. Set the version to 1.3.5 if it isn’t already, then click ‘Generate Project’ and your project will begin downloading. Unzip the file and open it with a text editor or your favorite IDE.
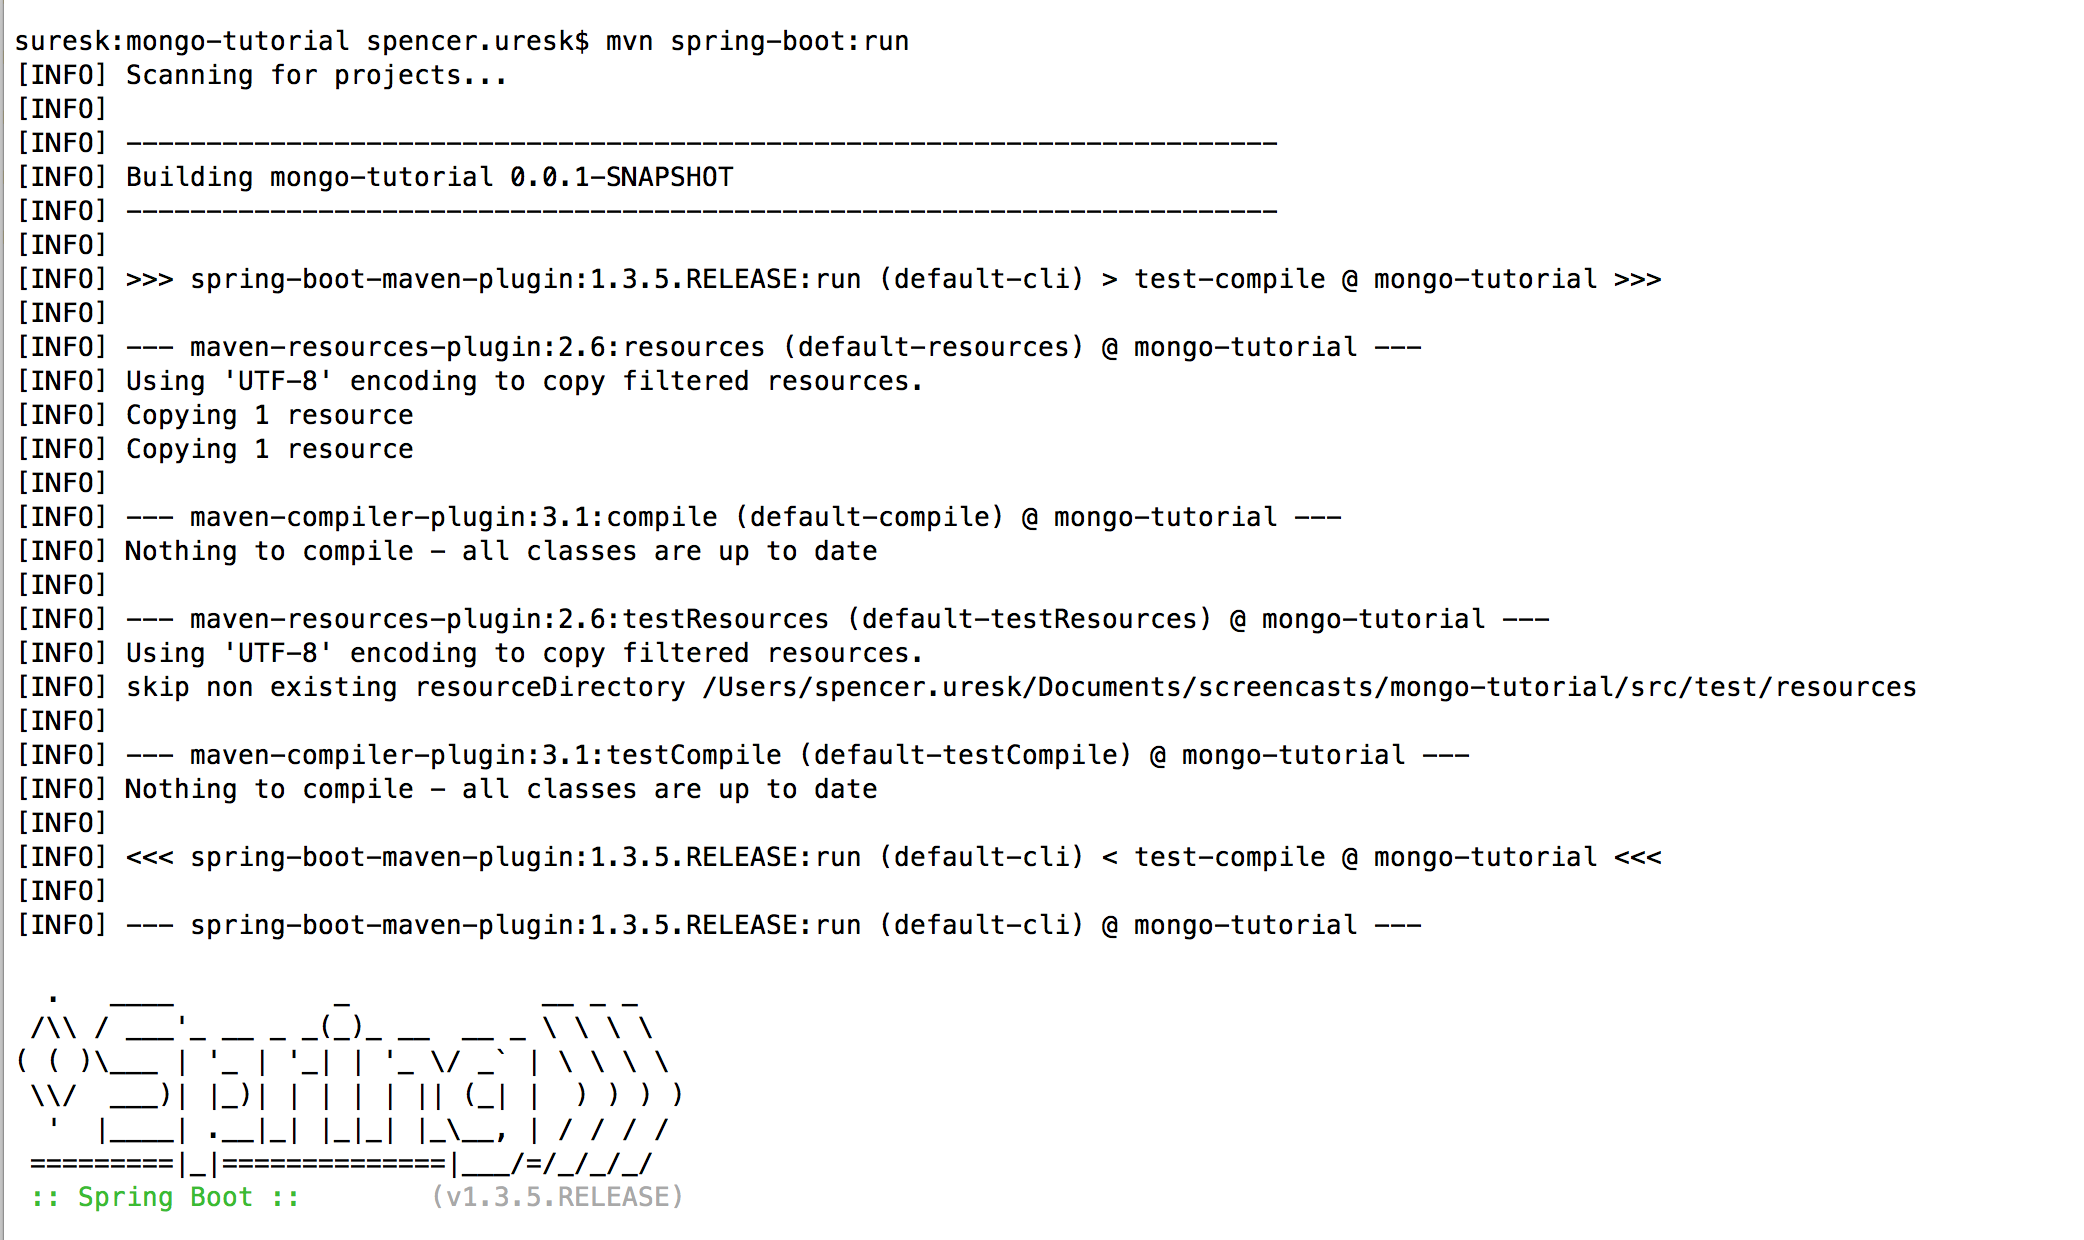
To run a Spring Boot application from the command line, navigate to the directory you unzipped it to and run ‘mvn spring-boot:run’
Configuration
There isn’t a lot of configuration we need to do; we just need to tell Spring Data about our Mongo instance. Assuming you set yours up with default settings, the following is all you need:
spring.data.mongodb.database=car_dealer
spring.data.mongodb.host=localhost
spring.data.mongodb.port=27017
Here we are telling Spring Data the host and port of our Mongo instance. We also give it a database name, and if the database doesn’t already exist it will be created for us. This is all the configuration we need. If you need to specify other configurations, such as a username or password, you would do it here. You can see all available properties here.
Model
Now, we need to model our documents. Let’s call ours ‘Car’ and give it a make, model, and description. Here is our Java class to accomplish this:
src/main/java/com/tests4geeks/tutorials/model/Car.java
package com.tests4geeks.tutorials.model;

import org.springframework.data.mongodb.core.mapping.Document;

@Document(collection = "cars")
public class Car {

  private String id;

  private String make;

  private String model;

  private String description;

  public Car() {}

  public String getId() {
    return id;
  }

  public void setId(String id) {
    this.id = id;
  }

  public String getMake() {
    return make;
  }

  public void setMake(String make) {
    this.make = make;
  }

  public String getModel() {
    return model;
  }

  public String getDescription() {
    return description;
  }

  public void setDescription(String description) {
    this.description = description;
  }

  public void setModel(String model) {
    this.model = model;
  }

}
This defines a Car class that has an id (provided by Mongo), make, model and description. You’ll also notice we annotate it with @Document and provide a collection called “cars”. This tells Spring Data to put it in the “cars” collection, which will be created if it doesn’t exist. Other than the @Document annotation, this is a plain Java object.
Repository
A Repository is a way to manage data objects in Spring Data. For most common methods – like saving a document, updating it, deleting it, or finding it by id – Spring Data will automatically implement the necessary logic. All we have to do is implement the CrudRepository interface and specify our key and document types:
src/main/java/com/tests4geeks/tutorials/repository/CarMongoRepository.java
package com.tests4geeks.tutorials.repository;

import org.springframework.data.repository.CrudRepository;

import com.tests4geeks.tutorials.model.Car;

public interface CarMongoRepository extends CrudRepository{}
That’s all we need for our repository – we can now inject it into other Spring beans.
Want to use MongoDB in your Python app? Check this tutorial: Spring Data, Spring Boot, MongoDBClick To TweetView/Controller
Spring MVC and Thymeleaf are outside the context of this article, but here are the view and controller snippets to get you going:
src/main/resources/templates/home.html
<html>
    <head>
        <title>MongoDB/Spring Boot tutorial from tests4geeks.com</title>
        <style>
            table, th, td {
               border: 1px solid black;
               border-spacing: 0px;
            }
            th, td {
                padding: 10px;
            }
        </style>
    </head>
    <body>
        <table>
            <thead>
                <tr>
                    <th>Make</th>
                    <th>Model</th>
                    <th>Description</th>
                    <th>Year</th>
                </tr>
            </thead>
            <tbody>
                <tr th:each="car : ${carList}">
                    <td th:text="${car.make}"></td>
                    <td th:text="${car.model}"></td>
                    <td th:text="${car.description}"></td>
                    <td></td>
                </tr>
            </tbody>
        </table>
        <br />
        <h2>Add Car</h2>
        <form action="/addCar" method="POST">
            Make <input type="text" id="make" name="make" /><br />
            Model <input type="text" id="model" name="model" /><br />
            Description <textarea rows="5" cols="70" id="description" name="description" /><br />
            <input type="submit" />
        </form>
        <h2>Search for cars</h2>
        <form action="/search" method="GET">
            <input type="text" name="search" id="search" th:value="${search}" />
            <input type="submit" value="Search" />
        </form>
    </body>
</html>
src/main/java/com/tests4geeks/tutorials/controllers/CarController.java
package com.tests4geeks.tutorials.controllers;

import org.springframework.beans.factory.annotation.Autowired;
import org.springframework.stereotype.Controller;
import org.springframework.ui.Model;
import org.springframework.web.bind.annotation.ModelAttribute;
import org.springframework.web.bind.annotation.RequestMapping;
import org.springframework.web.bind.annotation.RequestMethod;
import org.springframework.web.bind.annotation.RequestParam;

import com.tests4geeks.tutorials.model.Car;
import com.tests4geeks.tutorials.repository.CarMongoRepository;

@Controller
public class CarController {

    @Autowired
    CarMongoRepository carRepository;

    @RequestMapping("/home")
    public String home(Model model) {
        model.addAttribute("carList", carRepository.findAll());
        return "home";
    }

    @RequestMapping(value = "/addCar", method = RequestMethod.POST)
    public String addCar(@ModelAttribute Car car) {
        carRepository.save(car);
        return "redirect:home";
    }

    @RequestMapping(value = "/search")
    public String search(@RequestParam String search) {
        return "home";
    }

}
The controller is what we want to look at now. You’ll notice we inject our Repository on lines 17/18. On line 22 we call carRepository.findAll() – we didn’t actually write this method ourselves, but it is part of the Spring Data Repository functionality we get for free by extending the ‘CrudRepository’ interface. Likewise, our save() method on line 28 – which saves a document – is something we get automatically from CrudRepository.
Running
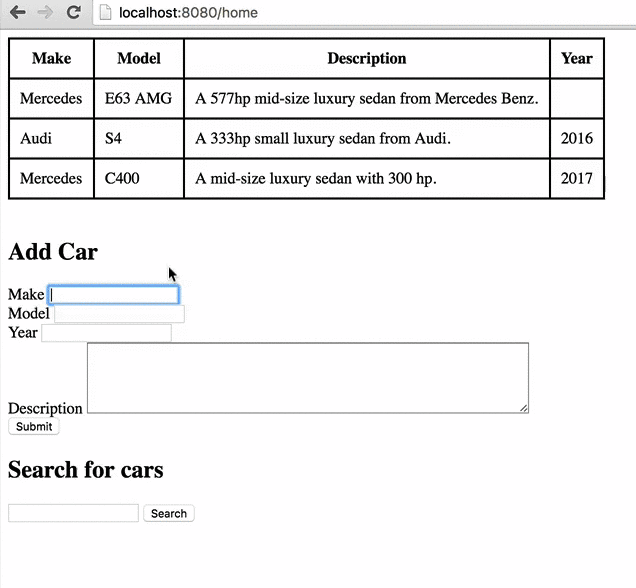
Fire up your Spring Boot application (you can go to the root of the project and run mvn spring-boot:run) and go to http://localhost:8080/home. You should be able to add a car and view its information in the table.
Adding a field
You’ll see there is a slot for ‘year’, but we forgot to include it. Let’s practice adding a field to a document in a couple easy steps.
- Add the field to the model
src/main/java/com/tests4geeks/tutorials/model/Car.java
package com.tests4geeks.tutorials.model;

import org.springframework.data.mongodb.core.mapping.Document;

@Document(collection = "cars")
public class Car {

    private String id;

    private String make;

    private String model;

    private String description;

    private Integer year;

    public String getId() {
        return id;
    }

    public void setId(String id) {
        this.id = id;
    }

    public String getMake() {
        return make;
    }

    public void setMake(String make) {
        this.make = make;
    }

    public String getModel() {
        return model;
    }

    public String getDescription() {
        return description;
    }

    public void setDescription(String description) {
        this.description = description;
    }

    public void setModel(String model) {
        this.model = model;
    }

    public Integer getYear() {
        return year;
    }

    public void setYear(Integer year) {
        this.year = year;
    }

}
That’s all we need to do from the Spring Data/Mongo perspective. Our model now has a year that is represented by an integer and any existing documents will just have a Null year.
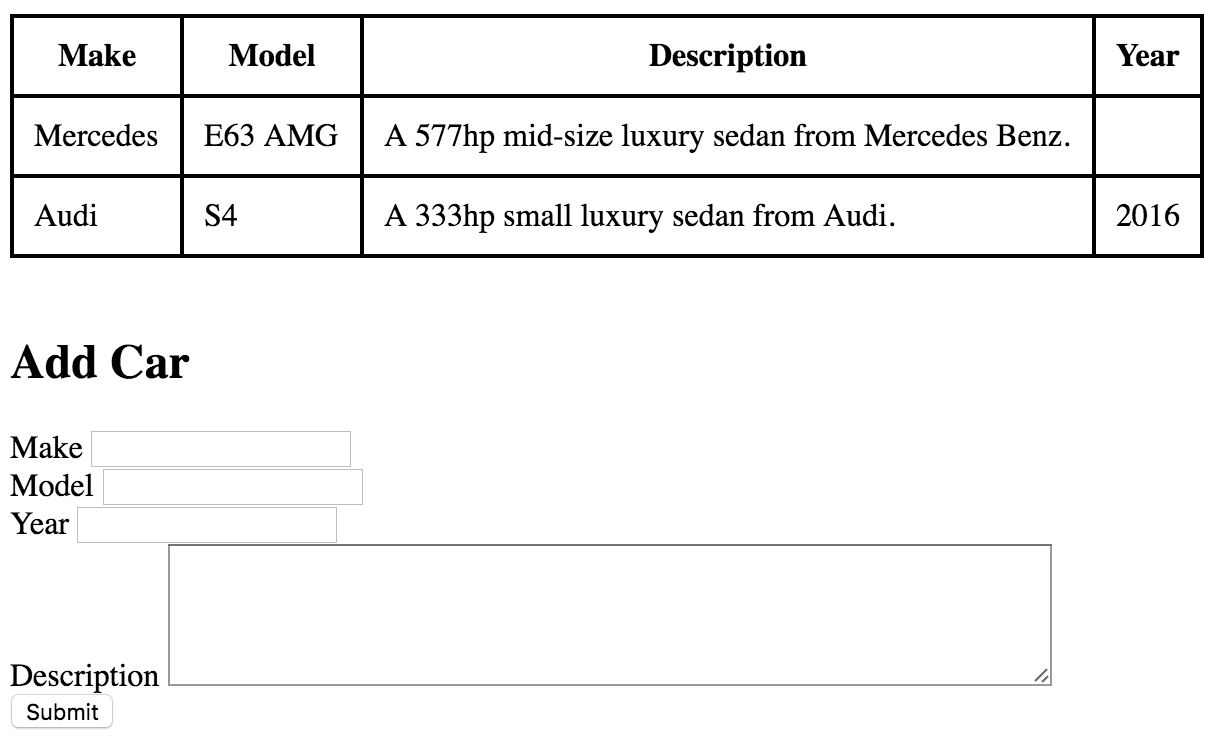
2. Add the field to the template (table and input)
src/main/resources/templates/home.html
<html>
    <head>
        <title>MongoDB/Spring Boot tutorial from tests4geeks.com</title>
        <style>
            table, th, td {
               border: 1px solid black;
               border-spacing: 0px;
            }
            th, td {
                padding: 10px;
            }
        </style>
    </head>
    <body>
        <table>
            <thead>
                <tr>
                    <th>Make</th>
                    <th>Model</th>
                    <th>Description</th>
                    <th>Year</th>
                </tr>
            </thead>
            <tbody>
                <tr th:each="car : ${carList}">
                    <td th:text="${car.make}"></td>
                    <td th:text="${car.model}"></td>
                    <td th:text="${car.description}"></td>
                    <td th:text="${car.year}"></td>
                </tr>
            </tbody>
        </table>
        <br />
        <h2>Add Car</h2>
        <form action="/addCar" method="POST">
            Make <input type="text" id="make" name="make" /><br />
            Model <input type="text" id="model" name="model" /><br />
            Year <input type="text" id="year" name="year" /><br />
            Description <textarea rows="5" cols="70" id="description" name="description" /><br />
            <input type="submit" />
        </form>
        <h2>Search for cars</h2>
        <form action="/search" method="POST">
            <input type="text" name="search" id="search" th:value="${search}" />
            <input type="submit" value="Search" />
        </form>
    </body>
</html>
We now have a year field on our model.
[Snippet2]
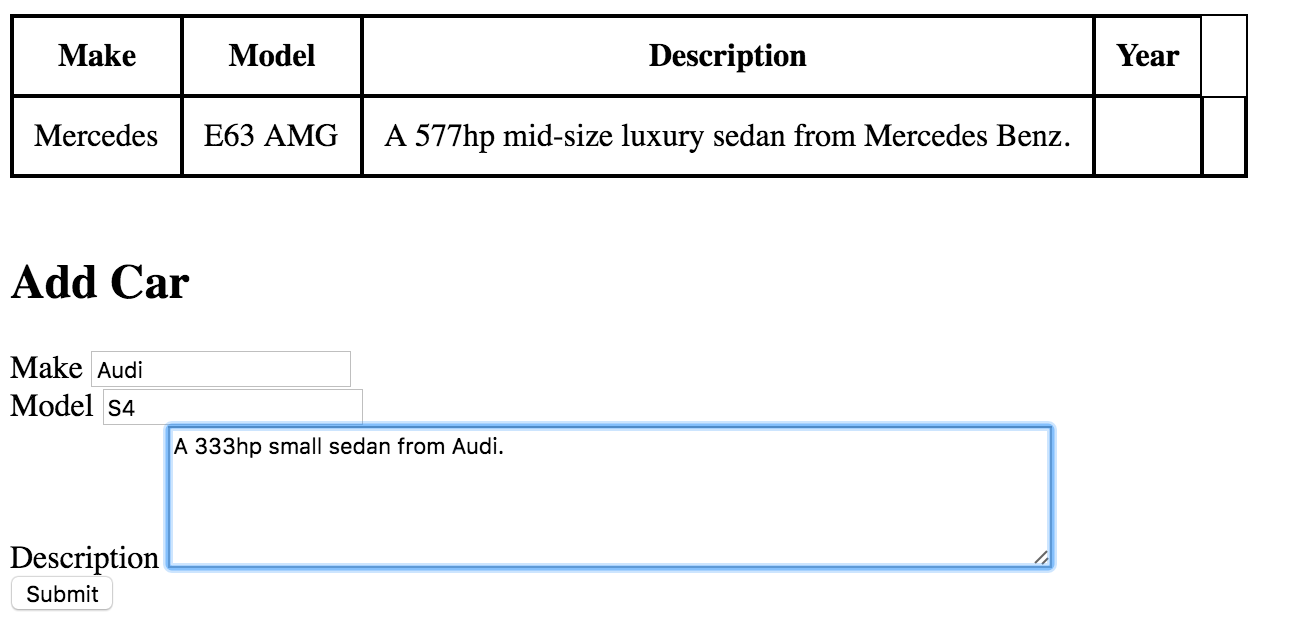
Searching
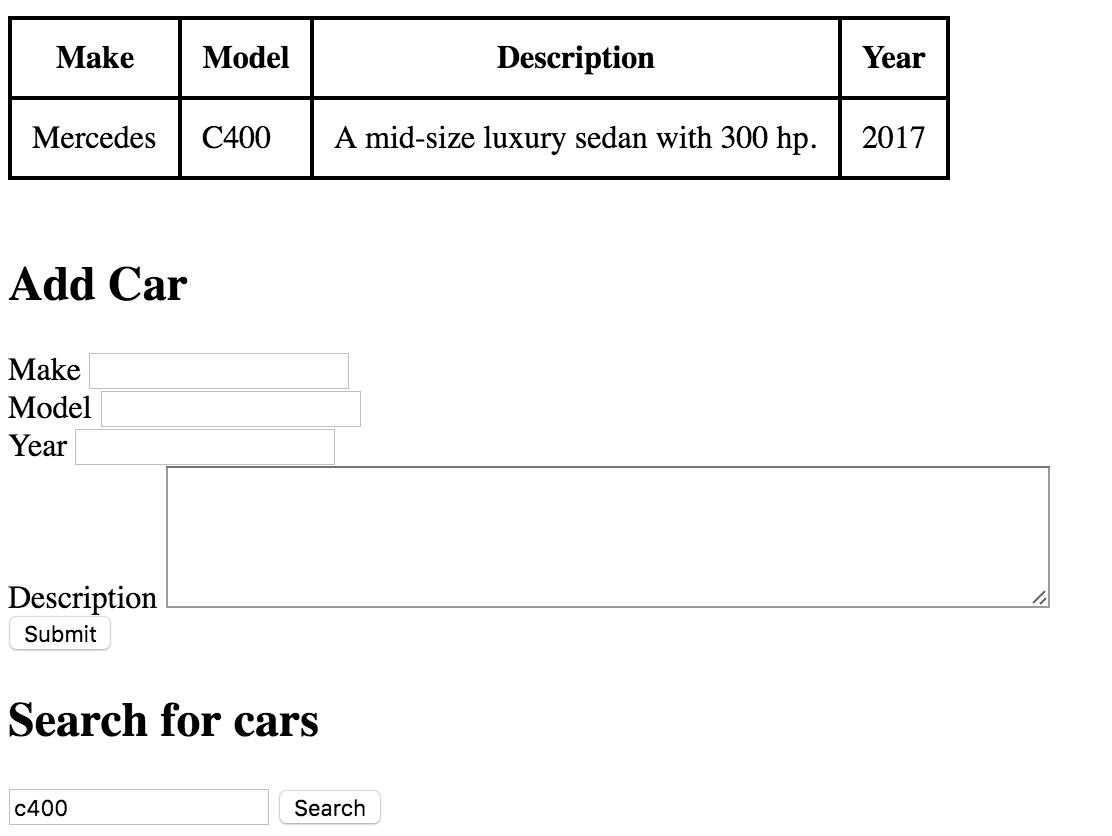
Let’s have a look at how to add search functionality while also working with MongoTemplate. The template already has a search box, so let’s make it so that any text in the search box will search the make, model, and description field.
We need to create a CarSearchRepository bean that will hold our custom code for searching. The basic API for interacting with MongoDB in Spring Data is MongoTemplate, which has operations for creating, updating, deleting, and finding documents in Mongo DB. We’ll inject a MongoTemplate into our repository so that we can use the find() method to pass it a query that will search for our cars.
We’ll use the Query functionality in Spring Data to create a Mongo query that does a case-insensitive regex search across the three fields, like this:
src/main/java/com/tests4geeks/tutorials/repository/CarSearchRepository.java
package com.tests4geeks.tutorials.repository;

import java.util.Collection;

import org.springframework.beans.factory.annotation.Autowired;
import org.springframework.data.mongodb.core.MongoTemplate;
import org.springframework.data.mongodb.core.query.Criteria;
import org.springframework.data.mongodb.core.query.Query;
import org.springframework.stereotype.Repository;

import com.tests4geeks.tutorials.model.Car;

@Repository
public class CarSearchRepository {

    @Autowired
    MongoTemplate mongoTemplate;

    public Collection searchCars(String text) {
        return mongoTemplate.find(Query.query(new Criteria()
                        .orOperator(Criteria.where("description").regex(text, "i"),
                                    Criteria.where("make").regex(text, "i"),
                                    Criteria.where("model").regex(text, "i"))
                        ), Car.class);
    }

}
This will take search text and match it against all of our text fields.
Now, let’s inject the search repository into our controller to our implementation with an @Autowired annotation and implement the search method by taking the search string from the request, passing it to our search method, and displaying the results in the table:
src/main/java/com/tests4geeks/tutorials/controllers/CarController.java
package com.tests4geeks.tutorials.controllers;

import org.springframework.beans.factory.annotation.Autowired;
import org.springframework.stereotype.Controller;
import org.springframework.ui.Model;
import org.springframework.web.bind.annotation.ModelAttribute;
import org.springframework.web.bind.annotation.RequestMapping;
import org.springframework.web.bind.annotation.RequestMethod;
import org.springframework.web.bind.annotation.RequestParam;

import com.tests4geeks.tutorials.model.Car;
import com.tests4geeks.tutorials.repository.CarMongoRepository;
import com.tests4geeks.tutorials.repository.CarSearchRepository;

@Controller
public class CarController {

    @Autowired
    CarMongoRepository carRepository;

    @Autowired
    CarSearchRepository carSearchRepository;

    @RequestMapping("/home")
    public String home(Model model) {
        model.addAttribute("carList", carRepository.findAll());
        return "home";
    }

    @RequestMapping(value = "/addCar", method = RequestMethod.POST)
    public String addCar(@ModelAttribute Car car) {
        carRepository.save(car);
        return "redirect:home";
    }

    @RequestMapping(value = "/search")
    public String search(Model model, @RequestParam String search) {
        model.addAttribute("carList", carSearchRepository.searchCars(search));
        model.addAttribute("search", search);
        return "home";
    }

}
Now we can search for our cars across any of the three text fields:
Conclusion
Spring Data is an incredibly simple yet powerful way to interact with MongoDB. You can read more about it here. As a reminder, this tutorial is available on Github if you want to see what the finished product looks like.
Want to use MongoDB in your Python app? Check this tutorial: Spring Data, Spring Boot, MongoDBClick To TweetSpencer Uresk is a software architect who works with Java, Spark, Hadoop, and Elasticsearch. He blogs at www.spenceruresk.com.
Coding skills assessment
If you're looking to hire software engineers and want to ensure that you only interview qualified candidates, we've created coding tests that can significantly simplify your hiring process:
Hi, Very nice post!
Although, i just want to know how your MongoTemplate bean got created?
Hi Spencer,
Thank you for the good tutorial!
Since I’m new to Spring Boot and MongoDB, it helped me to get started quickly.
Hello,
Where do we set those mongoDB configurations?
spring.data.mongodb.database=car_dealer
spring.data.mongodb.host=localhost
spring.data.mongodb.port=27017
in application.properties file
You set them at application.properties under src/man/resources
go to resources -> application.properties.
inside application.properties which is available in java/main/resources
applications.properties
How can you make it where it will display all the data from mongodb? eg; if mongodb has data already and you load up this site, the data should display
Ignore. It already does that function, I was using wrong database collection
How do you Update and delete the table row?
hi friend i need help, i am new to spring boots but i have downloaded from github and added in sts i am runing it but i am getting this error can u help me out with this
___________________________________________________________________________________
Whitelabel Error Page
This application has no explicit mapping for /error, so you are seeing this as a fallback.
Wed Apr 12 14:58:30 IST 2017
There was an unexpected error (type=Not Found, status=404).
No message available
____________________________________________________________________________________
where you have given connection to the mongoDB where u have created a MOngoClient objecct
It is very easily to learn the Spring data and mongodb operation. Please can you send me the update and delete operation on same way.
Thanks for given this example. It is awesome work.
Thanks & Advance
Prabu
Pingback: general steel buildings
Pingback: california general contractor
Pingback: china outsourcing company
Pingback: sourcing in china
Thank you!
very useful.
Perfect article out there to get started with MongoDB using Spring Boot.
config with 2 database?